A Work In Progress...
Sketching a dynamic figure can feel daunting, especially when aiming for a fluid, natural look that transitions from rough concept to polished ink. In this Work-In-Progress Wednesday post, we’ll explore how the “8 Limbs of Sketchbooking” guide the process from initial inspiration to the final, inked artwork. By breaking the journey down into these steps, we’ll see how each stage contributes to building a figure drawing that feels both spontaneous and thoughtfully crafted.
Limb 1: Conceptualization - Setting the Vision
Our sketch journey begins with the idea. Whether you’re capturing a figure from life, imagination, or reference, it’s crucial to have a clear vision. Think about the pose, the emotion, and the character’s intent. Jot down words or thumbnail sketches to ground your vision. This step sets the foundation for everything that follows.
Limb 2: Rough Forms - Laying Down the Energy
Next, dive into the sketchbook with loose, painterly blobs. These blobs are not about precision but about movement and flow. Imagine the figure’s energy as an abstract shape, hinting at motion rather than detail. At this stage, you’re capturing the essence of the pose—whether it’s relaxed, tense, or dynamic. Use light, sweeping lines that crisscross to suggest the body’s rhythm.
Limb 3: Structure and Proportion - Building the Frame
With the blobs in place, it’s time to introduce structure. Use simple geometric shapes to define the head, torso, and limbs. Think of cylinders for arms, cubes for the torso, and ovals for the head. This skeletal framework helps anchor the figure, ensuring the proportions feel believable. This is where the figure begins to take recognizable form, moving beyond abstraction.
Limb 4: Block-In - Solidifying the Silhouette
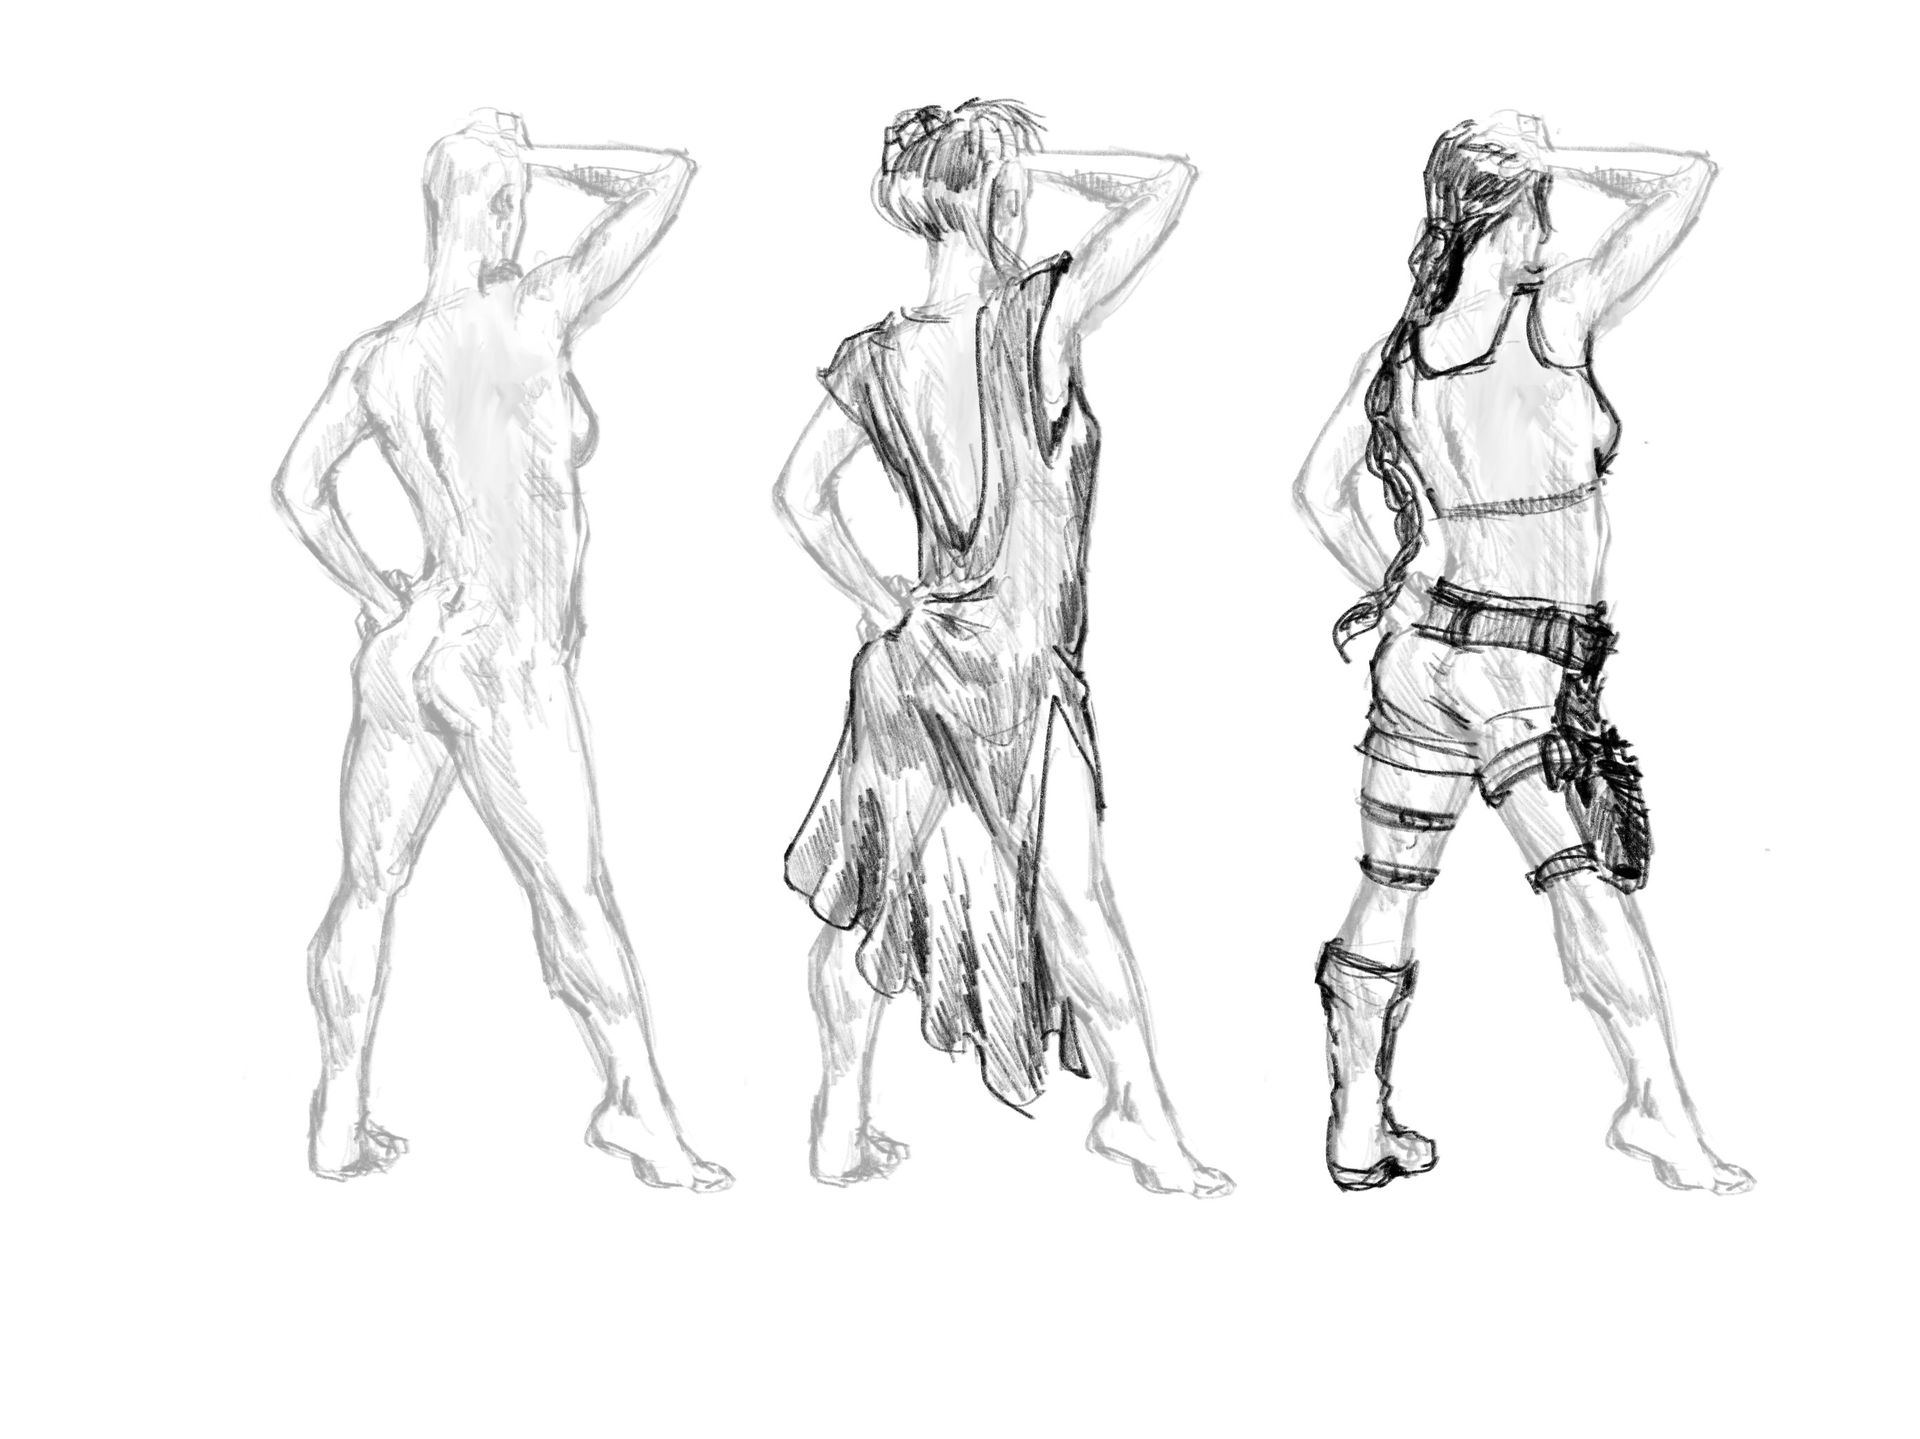
Once the structure feels balanced, begin refining your shapes. Smooth out the transitions between blobs and start indicating muscle groups and contours. You’re essentially moving from an abstract representation to a more tangible form. The goal is to maintain the figure’s energy while gradually introducing anatomical accuracy.
Limb 5: Detail Development - Crafting Identity
Now comes the fun part—adding details. Work on defining the facial features, refining the pose, and incorporating key elements like hands and clothing. Keep the lines purposeful and light, allowing for adjustments. Consider the character’s mood and how subtle shifts in line can convey emotion. Don’t rush; let the figure develop organically.
Limb 6: Line Clarity - Cleaning and Committing
After the details feel cohesive, start cleaning up your linework. Erase unnecessary construction lines and focus on clarity. At this stage, you’re committing to the final contours and defining the line weight. Consider where you want the viewer’s eye to focus and adjust line thickness accordingly—thicker lines for areas closer to the viewer, thinner lines for distant parts.
Limb 7: Inking - Finalizing the Form
This limb is where your figure drawing becomes definitive. Switch to ink or a dark pencil, carefully tracing the most important lines. Inking should enhance, not overwhelm, the original sketch. Be mindful of line weight and tapering, as they convey volume and depth. Slow, deliberate strokes work best to maintain precision without losing the figure’s initial liveliness.
Limb 8: Presentation - Preparing for Color
With the linework complete, it’s time to clean the sketch one last time. Remove any remaining guidelines and make sure the ink is crisp. The figure should now stand confidently on the page, ready for the next phase of coloring or further texturing. This final presentation step solidifies the transformation from concept to finished drawing.
Embracing the WIP Mindset
The essence of Work-In-Progress Wednesday lies in celebrating the journey, not just the result. Embracing the “8 Limbs of Sketchbooking” allows you to approach figurative creation methodically while remaining open to evolution. Each stage builds upon the previous, offering both structure and creative freedom.
Tips for Your Next Figurative Sketch
- Stay Adaptive: Don’t be afraid to modify your approach if the figure feels stiff or unnatural.
- Trust the Process: Some stages may feel messy or chaotic. That’s part of developing the figure’s unique identity.
- Document the Progress: Take photos or notes at each limb to see how your figure evolves.
- Keep Practicing: The more you practice, the more naturally this process will flow, blending technical skill with creative intuition.
Final Thoughts
Using the “8 Limbs of Sketchbooking” as a guide, figurative creation becomes a manageable, inspiring practice. By understanding the importance of each stage, you’ll not only improve your figure drawing skills but also enjoy the process of building a character from concept to completion. Keep experimenting, and remember that each sketch is a step toward mastering your craft.